Mar 22, 2022

March Double Duty with Pinkfresh Studio Stamps

It's the 22nd and time for another Double Duty Challenge.  A group of friends invited me to join the fun this year. The concept is to use one stamp set from a specific company each month to create two cards, (Double Duty). 

At least one thing should be the same on both cards. We can use different images and sentiments from the same set. Or we can use the same image two different ways. As an added challenge, one item must be used on both cards, Double Duty yet again.

Posting day is the 22nd - another double!

This month's company is Pinkfresh Studios, a new favorite of mine.  Here are my cards:


The set is called Just a Little Lovely and has a matching die for the floral spray.  


The image is colored with Karin Brush Marker Pro markers and is on Gina K's Heavy Weight Pure Luxury white stock.


The background panel is on watercolor stock, colored with Brushos and then spritzed with Shimmer Mist by A Muse.

This is a picture of the panel drying.


Here's the other card using the same image and sentiment. 

The panel was colored with blending brushes using Magenta Madness ink by Stampin' Up. 

The image was stamped directly onto the tinted panel and then die cut. I used my Castle Arts pencils to color it and framed the panel in black.  Don't look too closely because I had to hand cut the black panel, ha ha!

The last part of double duty on each card are the clear water droplets by Dress My Craft.

Both of these cards have been mailed out to two friends in other parts of the country. Each of them is working very hard at reshaping their life at this time. Hopefully this gives them a smile!

Hop on over to the blogs of my team mates and admire their own Double Duty Cards:

Barb

Jeanette

Carol

Thanks for stopping by!

Mar 17, 2022

Dueling Darlings - "Team Tea"

I am a few days late with this, our Dueling Cards are to be posted on the 15th...I seem to have a streak of Too Much Life.  More likely it's Too Disorganized...but that's another story!  

Barb ("Team Coffee") and Lorraine ("Team Tea") brewed up a coffee and tea challenge for this month. Lorraine put together a fabulous kit for us to work with!  Thank you Lorraine!!

Here's my little cuppa:

Image/Sentiments are Hampton Arts Heart Mug, steam wisps and small hearts.  The mug and sentiment are stamped with New England Ivy ink by Close to My Heart.

Designer Papers are Close to My Heart green, Papertrey Ink Ivy paper and Simply Stories brown polka dot.

Ribbons are Close to My Heart Sheer Green and Celebrate It tan jute polka dot ribbon.

Embellishments are Jolee's small white mugs (which I colored with Spectrum Noir markers), white hearts by Park Lane and a green enamel dot by Close to My Heart.


Lorraine also treated us to a teabag in our kits, thereby sending us a "hug in a mug". Isn't that thoughtful of her?

Lorraine, I truly apologize for being late, but let me assure you that it was not because your kit was hard to work with!  Thank you so much for a fun challenge this month.


Feb 25, 2022

February's Double Duty (A Bit Late)

First, let me apologize to the team for being so tardy!  This is supposed to be posted on the 22nd. Barb, Jeanette & Carol should put me in the naughty corner, LOL.

This fun challenge is the brain-child of Barb. Each month we use a stamp set from a predetermined company and make 2 cards with it. Plus, we are to used at least one element on each card.  Then, we are to post on the 22nd.  This gives us a minimum of 3 sets of doubles.

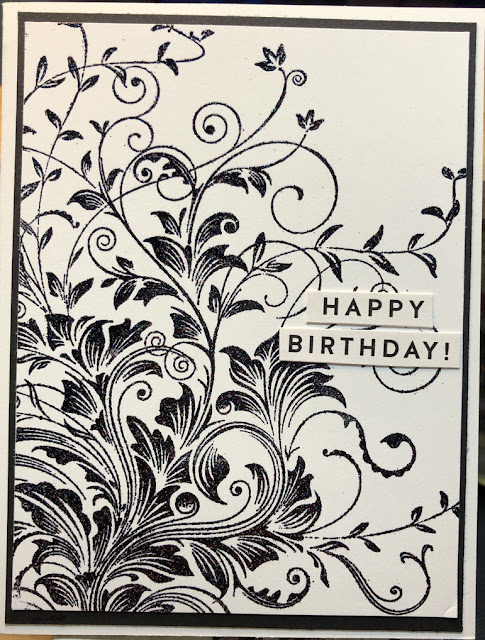
This month we used Hero Arts and I picked the 2012 background stamp called "Leafy Vines".  Inspired by Carol's brilliant black and white cards over the years I decided to give that a try.


The white paneled card was heat embossed with Ranger's Black Sparkle embossing powder. 


My photography skills come up short to do it justice.  But hopefully this shot at an angle gives you some idea of the sparkle


Here's the black paneled card.  It took 3 attempts to get what I wanted. 

This is heat embossed with Taylored Expressions Fine Detail White embossing powder.


Both sentiments are from sets by Simon Says Stamp. I must admit that cutting them is a challenge for me!  


Thanks for stopping by. Double Duty Team, I promise to be on time next month!  Hop on over to their blogs and admire their Double Duty creations with Hero Arts stamps:

Barb

Jeanette

Carol

Feb 15, 2022

Dueling Darlings February 2022

Did you know that February is LIBRARY LOVERS Month??!!  I didn't 😉.

However, our team leaders knew and used this as our theme.


Tracie is this month's leader for our team and sent us a kit full of fun library themed papers, die cuts and sentiments.

Of course I had to make a double pocket card to hold two bookmarks.  


The pink bookmark was included in the kit from Tracie. Isn't it pretty?


The other one I made with a piece of the designer paper, a bookworm and stack of books that were included in the die cuts that Tracie sent.  I topped it off with one of the buttons and some twine which was also in the kit.


Here's a look at the card front with the 2 pockets without the bookmarks. I thought it was a nice way to feature the pretty papers that Tracie chose.


This is a top fold card, on Stampin Up Early Espresso card stock and layered with their Pool Party card stock.


The inside is finished with one of the sentiments and another piece of the designer paper from the kit.


Kit Contents:

Stamped images from "Book Worm" by Fun Stampers Journey
Designer Papers: 
  Books: Witches & Wizards by Echo Park
  Words: Scribe by Authentique
  Cubbies: Farmhouse Market by Carta Bella
Ribbons from The Ribbon Boutique (Red) and Island Indigo (Blue) by Stampin Up.
Gems from Fun Stampers Journey
Buttons and twine from Tracie's stash.

Tracie and Carol, this was a great theme.  Thanks Tracie for such a generous kit! I'm saving the adorable die cuts left over for another card or two!

Feb 13, 2022

February Hot Mess = Success!

One day late to post this, lots going on last week.

Our group of friends have a challenge. Make a card that involves a mess. I don't think that anyone in the group likes our stamping area to be too messy, so this is a stretch for all of us.  

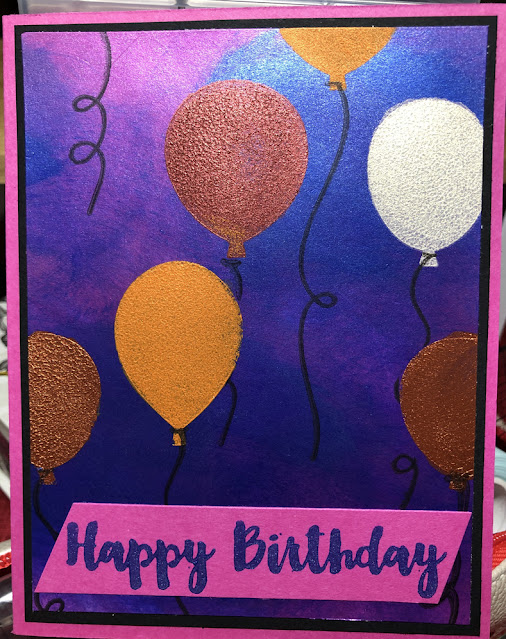
Here's my Hot Mess = Success! card for February:

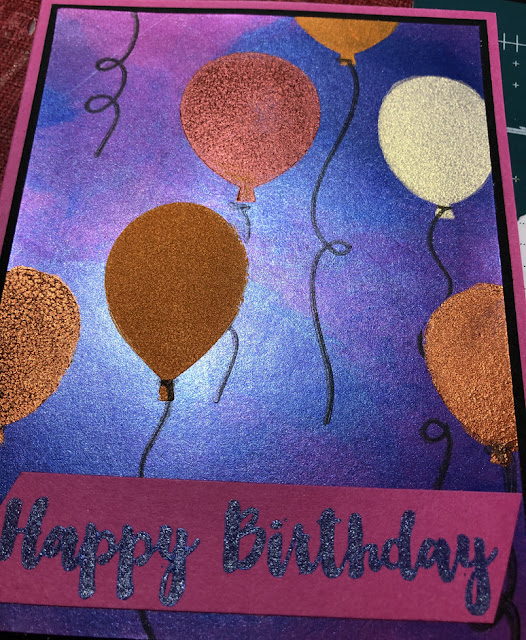
I was back to playing with Cosmic Shimmer Metallic Gilding Polishes by Creative Expressions. I think I'm in love with these.

The stencil is one of a 3-part layering stencil called Balloon Party by Taylored Expressions.  The matching stamp set provided the black balloon ribbons.

This is white, 110# card stock with the Mediterranean Blue and Lush Pink sponged on. 

Then the stencil was used to heavily sponge on Tangy Tangerine, Gold Treasure, Red Bronze and Enchanted Gold polishes for the balloons. It all needed some drying time.


Stamping the black ribbons on top of the gilded background was a little tricky. I used Gina K Designs' Black Amalgam ink.  It did pretty well, but it is different to stamp onto the gilded surface. I masked some of the balloons to get the ribbons behind them.

The Happy Birthday sentiment had the Mediterranean Blue polish applied directly to the stamp and then stamped onto the card stock. Then it was hand trimmed.

Hop on over to these blogs to admire the Hot Mess Successes created by my friends:

Kelly

Jeanette

Barb

Terry

Carol

Thanks for stopping by!

Jan 27, 2022

January Mini Stamp Camp - Day 4

Here it is - the last day of our virtual Mini Stamp Camp. It sure has been fun trying new techniques, creative ways to feature paper and embossing folders, inks, etc!

If you haven't checked out each daily tutorial by our Camp Counselors, here's the list and links to their blogs:

Monday/January 24th  ~ Jeanette @ Creativeplay 
Tuesday/January 25th ~ Kelly @ Sandcastlestamper
Wednesday/January 26th ~ Barb  @ Inkingintoretirement
Thursday/January 27th ~ Darlene (me!) @ Accordingtobijou

Here's my card for today's tutorial featuring Cosmic Shimmer Metallic Gilding Polish from Creative Expressions (so fun!)


I used 2 colors of Gilding Polish: Enchanted Gold and Ocean Teal.

This is a 5"x7" card when flat. It stands on it's own using the folds and the right side tucked under something that is popped up on the right side of the inside panel (the bow here)

Here's a view of the card from the top: 


I haven't put any sentiment on the inside yet. Once I know who will receive it, I can finish the inside appropriately.

Ready to get started?? I hope so!  Just take your time and have fun.


Cut 2 pieces of card stock to 5"x7".  I used White 110# for the back panel and "Taken With Teal" by Stampin Up for the front panel. The stenciled panels for the front came from another piece of white 110# white card stock.


Next I polished the entire 2 white pieces of card stock with the Enchanted Gold. They dry pretty quickly but you may want to give it a couple of minutes before the next step.


Ready to stencil?? YAY!

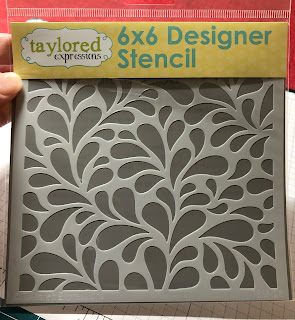
I used a 6"X6" stencil called "Splash" by Taylored Expressions.

Here's where you have 2 options:
1. 
Trim one panel slightly larger than the stencil you want to use. Then trim the 3 strips for the front after stenciling.
                   - OR -
2. Trim your strips now. Sizes:
two strips 1.5" wide and 5.5" long and one strip 2.25" wide and 5.5" long.

I did not trim my gilded 5x7" panel before using the 6X6 stencil. Duh! This meant that I had to reposition the stencil to completely cover the 7" card stock. Not a big deal if you can line up a repeating pattern. However, this pattern does not repeat. So there's my learning point!  

All turned out well, because when I was trimming the strips I just cut it such that the scraps were the edges where the pattern didn't line up.

Here's my panel taped to my craft pad, stencil taped on top and the layer of Teal Gilding Polish applied. 

NOTE: I found it better to apply a thick layer of polish by daubing with the sponge applicator. Brushing it on did not work. 

I was afraid to try Pixie Spray to the stencil to adhere it to the panel since it was gilded first. Let me know if you do it that way and how it worked for you.

When done with your stencil, drop it into some soapy water and let it hang out for a while. Then light brushing with your hand will remove the Gilding Polish.

Here's where I trimmed off the 3
strips and could discard these where the stencil didn't line up.

I didn't bother to clean the stencil when repositioning it. I just masked off the edge of the 5X7 panel, placed the stencil over the tape on that side, taped the stencil down again and continued daubing the polish.

Here's a photo of the stencil repositioned (uncleaned) and ready for me to finish stenciling the 5x7 panel. Notice the little spots of color along the left side. Those were trimmed off and discarded as shown in the photo above.


In hindsight, it's probably much easier to do option 2 above. Trim the 3 front panels (slightly longer than needed so you can tape them down) and stencil all 3 at once.  That's what I'll do next time!

This part needs some drying time before you can finish trimming and adhering it to your front panel. 


Time to create the fun fold!  Take the front panel and using a ruler or a scoring board score as follows:
1/2"
2 1/4"
4 3/4" 
6 1/2"
Ignore the purple card stock in the photo. This is my template that I use so that I can make this fold without having to look up how to do it!


Now to fold:
Burnish the left and right 1/4" scores so that they stick up.


Next, burnish the 2 remaining scores so that you end up with this shape:


Now apply Score Tape or similar double sided strong tape to the LEFT 1/4" fold. This is going to adhere your card front to the card back, so put the tape on the underside of the 1/4" flap. (You want the bumped out portion to be the front of your card)

Here's a side view of the Score Tape on the underside of the narrow left fold.


When your stenciled sections are dry and not gummy, trim to fit the three sections you've folded on the front panel.

Use glue or Score Tape to adhere the strips to your front panel. 

Remove the backing from the Score Tape on the left side of the front panel and attach it to the back panel.


Voila!! Now all you need to do is decide what you'll pop up on the right back panel.  This will hold the front panel in the open position when the card is standing upright.  

This time I used a bow on a foam dot. The 1/4" score on the right side tucks under the edge of the bow, holding the front panel in position so the card can stand up.

In the past I've used a die cut shape or a die cut phrase popped up. Just remember to only put the foam dots/squares on the center and right side of your shape. You'll want the left side clear so the front panel can tuck under the embellishment.

Now you decorate any or all of the front panels as you wish. I've left this one very simple, letting the stencil design be the main focus.


Here's a card that I made a while back with each panel decorated.  The options are almost unlimited! 

Take your time and have fun with the Gilding Polish, your stencils, the fun fold...

Since this may be a little more involved, I vote that you give yourself an extra day if needed. The whole point is to relax and play.  Not Stress out!!!

Thanks for hanging in with this tutorial. I can't wait to see what all of you create!  

Visiting here? Give yourself a treat and stop by the blogs of the other Campers to admire their handiwork from this week's camp:
Jeanette @ Creativeplay 

Jan 26, 2022

January Mini Stamp Camp - Day 3

Here we are on the third day of our virtual Mini Stamp Camp!  The very talented Barb is our Camp Counselor today and she provided a great tutorial called "Faux Tile Backsplash".  Here's her blog where you can see her card and the complete tutorial: Barbs Inkin' in Retirement.  

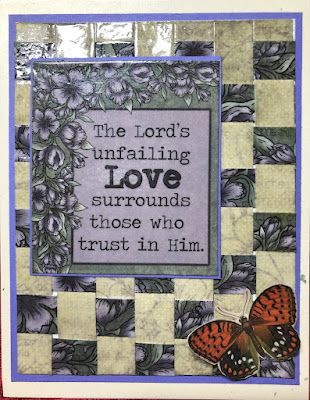
Here's my finished card.

Barb's instructions were to cut 1/4 inch strips of card stock, from 2 different papers. Then cut a panel and place Score Tape on all 4 edges. 

Remove the backing from the Score Tape on ONLY the top edge. Then adhere one color of the strips across the entire top.

Then begin weaving the other strips, tucking them snug against the row above.  When the entire length of the panel is woven, remove the backing from the Score Tape on the remaining 3 edges and adhere the woven panel.

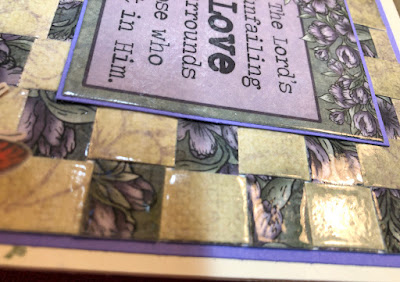
The doorbell rang, startling me and I had to run downstairs to get the door. Eventually when I came back to everything my panel had glued itself in some sections...leaving me with a loose weave toward the bottom. You can see the little white squares peaking through the weave.  Oh well, these things happen!


Then came the fun part.  Barb had us ink up the woven panel with VersaMark and give it a coating of clear embossing powder.  

Let it cool and repeat, which is when it really developed a deep gloss. Hopefully you can tell in this picture.


I used two papers from an old collection by Heartfelt Creations called "Posey Patch". It's beautiful paper and the sentiment is also cut from that collection, and clear embossed. 

The butterfly is from a paper collection by SEI called "Field Notes". I cut it out and clear embossed it as well.

This was really, really fun and I am pleased with how my card turned out. Even though I have some little "oops" I still like it!

Tomorrow is my turn as Camp Counselor and I sure hope that Barb, Kelly and Jeanette have fun with my tutorial.

Camp Counselors, their blogs, and the day each of us are assigned as counselor:

Monday/January 24th  ~ Jeanette @ Creativeplay 
Tuesday/January 25th ~ Kelly @ Sandcastlestamper
Wednesday/January 26th ~ Barb  @ Inkingintoretirement
Thursday/January 27th ~ Darlene (me!) @ Accordingtobijou


Thanks for stopping by and be sure to visit the blogs of my Camp Cohorts!