Dec 14, 2024

Creative Crew Challenge: "Thanks Snow Much"!

 Yay! It's the 15th and posting day for the Creative Crew!  

Terry hosted this month and her pick is "Bear Hugs" by Taylored Expressions. She also included sentiments from the "Beary Much Love" set also by Taylored Expressions.

Terry's papers were really pretty, so I headed over to the layout sketches on Split Coast to find something that would use all of them.

The image is colored with Olo Markers. I like that I could center the star between the bears kissing on the image panel!

The only thing used from my stash is some Cherry Pop card stock by Taylored Expressions.  Super cute kit, Terry!  Thank you!


Here are the links to the other Creative Crew members blogs and galleries. Be sure to visit and admire their creations.

Barb - Barb's Inkin' In Retirement

Carol - Lost in My Craft Room

Jeanette - Cre8tive Play

Lorraine - SCS Gallery

Terry - It's Totally Terry

Tracie - Crafty Creations by Tracie 

Dec 11, 2024

Hot Mess = Success Challenge

Each month on the 12th a group of friends challenge ourselves to get messy with our creative process.  The type of mess, and our individual definition of messy is wide open.  All that matters is that at the end of the mess we end up with a card created! 


I broke out Simon Hurley's kit from last September's Crop & Create Delivered virtual card making event for this challenge. I really love the cards!


Kit contents:

  • An exclusive stamp and die set of penguins and sentiments (no name supplied)
  • Spiral Star layering stencil
  • Confetti Strip rubber stamp
  • Frostbite and Clear Skies Astro Pastes by Simon Hurley (love these!)


These penguins are so adorable. I've already mailed the cards and made several more! 

This card features the layering stencil. The first layer has purple ink (I used Concord Grape by Taylored Expressions) applied with a blending brush.

The 2nd layer has the Clear Skies Astro Paste applied with a palette knife.  

While the panel dried the penguin was water colored by pressing out some ink from the pad, adding a drop or two of water and using a small brush.  I also added some sparkle to his earmuffs and scarf using Wink of Stella.

The sentiment is part of the stamp set. It was heat embossed with white embossing powder.  Both the image and the sentiment were then die cut with the dies included in the kit.


Here's a close up of the second card which features an ink blended white panel.  

It's stamped and embossed with white embossing powder using the Confetti Strip rubber stamp.  Then blue and purple inks are blended onto the panel.

Using clean sections of paper towels any ink on the surface of the embossed confetti rubs off.

The penguin was watercolored in a similar manner as the first card and Wink of Stella was applied to his balloon, hat & scarf.


The last card was really fun!

A white panel was ink blended with a gradient of colors then heat set to thoroughly dry the panel.

Then Frostbite Astro Paste was applied to both layers of the Spiral Star stencils.

A hand cut hill using white card stock has Frostbite Astro Paste applied in a thick layer. Using my fingers I created little peaks and valleys to resemble a snowy hill. This took quite a while to dry since I had such a thick layer.

The penguin was watercolored using the inks for the panel and Wink of Stella sparkled up his hat and scarf.

All of these have already been mailed out.  I especially like how flat they are for mailing yet have a lot of dimension from the Astro Pastes.  I can tell that I'll be making more of all of these for January birthdays and random kindness cards.

Thanks for dropping by my blog!  Be sure to visit my Hot Mess friends using the links below!

Jeanette

Barb

Terry

Carol


Nov 21, 2024

Double Duty Challenge with Concord and 9th

On the 22nd of each month some friends challenge ourselves to create 2
different cards repeating the same image, sentiment, etc on each card.  We have a predetermined list of the stamp company or specific challenge for each month and then...away we go! 

This month we feature Concord & 9th.  I went with "Pop Up Par-Tay" stamps, dies and stencil.  Using Cloud 9 Metallic Pigment Inks by Lisa Horton Crafts, I ended up with these!


Starting with two 6x6 panels one in purple and one in blue, the metallic inks were sponged onto the panels.


The blue panel has silver and gold metallic inks.

The background panel is embossed with the Diamond Cover Plate die that was included in the Jolly Holiday virtual card making event by Scrapbook and Cards Today.

The balloon die is part of the Concord & 9th Par-Tay set and the sentiment and balloon strings are from that stamp set.


The purple panel used silver, gold and copper pot inks, which are all by Lisa Horton Crafts. 

The same stamp set is used here. It's white embossed onto one balloon and  the sentiment banner.  The same cover plate from the first card is used to emboss the background panel.


Here's what direct-to-paper with the gold and silver metallic ink pads looks like:


You can see how solid and opaque the coverage is!

The sentiments and balloons were die cut from this.

Stamping the sentiment on top of the metallic inks required repeated impressions. Not a problem with a MISTI tool.


Another bonus to these cards is that they can be mailed easily. They're very flat. However the extra shine really makes them stand out.


Please drop by the blogs of the other Double Duty members and comment on their work:

Barb

Jeanette

Carol 


Nov 14, 2024

Creative Crew Challenge with Newtons Nook!

Yay! It's the 15th and posting day for the Creative Crew!  

Tracie hosted this month and chose "Sips and Stories" by Newton's Nook. She chose this image because November has National Animal Shelter Appreciation week and also I Love to Write Day on the 15th.

Here's my card. 

The image is colored with OLO markers.

Designer papers from Tracie include "Lovely" by Close to my Heart.

The I love Books die cut is by Newton's Nook Bookmark die set.

I added some heart and star embellishments from my stash.

Tracie asked us to share a good book we are reading or have read recently.  At this time I am making slow progress on "Revelations of Divine Love" by Julian of Norwich. I'm studying the version that was modernized slightly when published in 1934.  

It is the account of visits to an Ankress (or recluse) named Julian or Juliana who lived in a cell attached to the Church of St. Julian at Norwich. Her revelations occurred in May of 1373 at an estimated age of 30, and were shared when she was approximately 70 years old.  It is a fascinating study for me. 

Nov 11, 2024

Hot Mess = Success: Lift Technique with Alcohol Inks

Each month on the 12th a group of friends challenge ourselves to get messy with our creative process.  The type of mess, and our individual definition of messy is wide open.  All that matters is that at the end of the mess we end up with a card created!

I haven't played around with alcohol inks on Yupo paper so decided to give it a go.  This is my first set of cards:


This represents a panel that I wanted to throw away. The inks did not blend the way I wanted and adding rubbing alcohol to help them blend seemed to make things worse.

I set it aside to dry and started again with a different set of colors. Here is my second set of cards:


Both cards feature the "Lift Technique".  Using a stamp with a large, bold design, and starting with the blended Yupo panel, the stamp is inked with the Lift ink pad. 

Stamp firmly down onto the blended panel. Then quickly stamp it onto the blank white card stock panel. A MISTI or other stamp position tool really helps!

Then take a clean paper towel and carefully blot the Yupo panel. Be careful to always fold the paper towel so that a clean section is used each time you move around the panel. The image then appears, just like magic! When no more shine from the lift ink remains you are now finished with that panel.

By now my first attempt at blending inks onto a Yupo panel was dry.  I thought that since I was going to toss it in the trash, why not give the lift technique a try on that one. I turned out better than I expected. 

The stamp used is "Inked Florals" by Unity Stamp Company. 

Be sure to visit the Hot Mess Team and see what Hot Mess they have for this month.  Here are their links:

Oct 30, 2024

Catch Up Challenge

Several friends and I enroll in various Virtual Card Making events and classes.  Sometimes we are unable to attend the class when it is live, but fortunately the videos are available to participants to view later. 


One day we were lamenting how behind we were. One thing led to another and the concept of the Catch Up Challenge was created!  On the last day of the month we would post cards made from an event or a kit received in the past. 


I was unable to create along with September's Crop & Create Delivered card making event sponsored by Scrapbook and Cards Today.  It is a favorite event for all of us.

I chose to make the cards from the Hero Arts class which was taught by Channin Pelletier.  

We used the "Happy Fall Leaves" bundle of stamps and dies and the "Circular Grid" stencil, which are all by Hero Arts.

I varied my cards a tiny bit from the class but they are 95% true to the class design.

I'm happy to have an assortment of Fall themed cards for mailing out in the coming weeks. That''s what led me to choose the Hero Arts class as my Catch Up for October.

Here are the links for my friends in the Catch Up Club.  Please visit their blogs and admire their work from some past project or class.

Barb's Inkin' to Retirement

It's Totally Terry

Cre8tive Play: It's Cheaper than Therapy


Oct 23, 2024

Double Duty Cards Featuring Pinkfresh Studios

I am a day late in posting this, but on the 22nd of each month a group of us challenge ourselves to create 2 different cards using the same set, sentiment, etc on each card.  We have a predetermined list of the stamp company or specific challenge for each month and then...away we go!

Stamps by Pinkfresh Studios (one of our favorite companies!) were selected for this month's challenge. I decided to a set that we received from one of their virtual events,  "Pure Joy" stamps, stencils and dies.  A personal favorite of mine.

Here are the two cards that I made. 

This card was watercolored with Yasutomo pearlescent paints on a bright blue card stock. I do not know the origin of the card stock, but it's been in my stash a long time.

The border features a die from the "Rounded and Braided Rectangles" set by Pinkfresh Studios.

The images and sentiment are gold embossed. Then the images were  painted free hand.  Everything is popped up for dimension.  A sheet of glossy gold card stock is layered on the reverse side of the front panel.


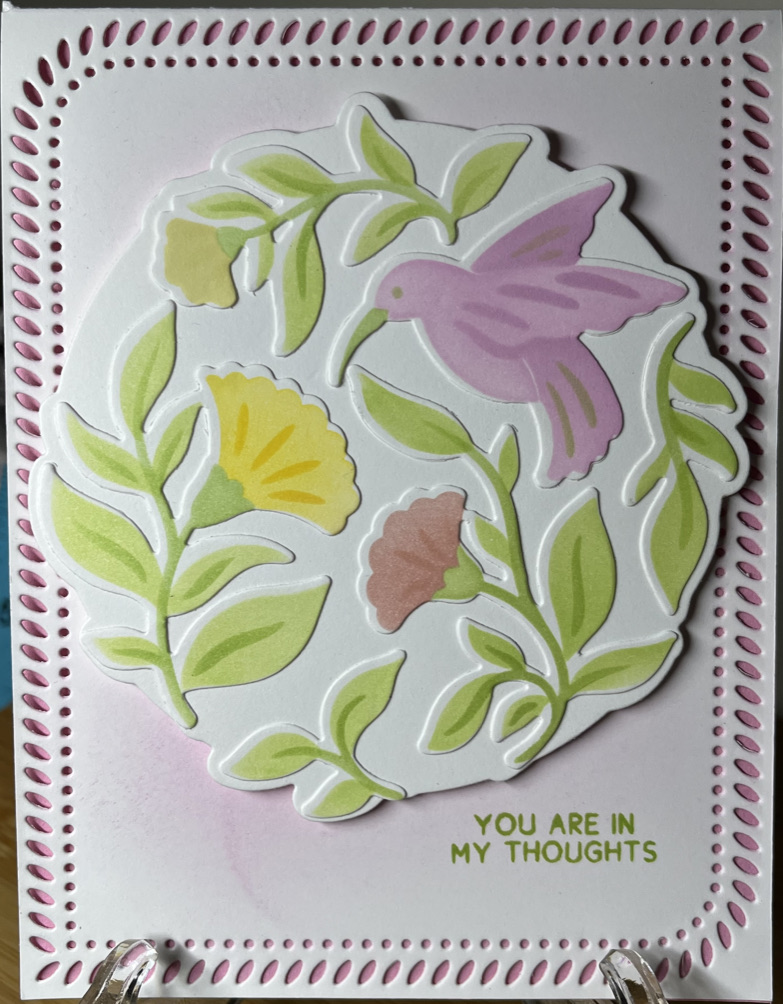
The second card is ink blended using the stencils and a combination of inks from Taylored Expressions and Gina K Designs. A light amount of pink ink was blended onto the front panel of the card, and the sentiment is stamped directly onto the panel.

A layer of pink card stock is mounted inside the card, onto the back panel so that when the card is closed the pink shows through the die cut border.

Repeated on each card are the die cut images, the border dies, the round layout of the images, and the sentiments from the same stamp set.

I have to revisit this set again and experiment with the images and sentiments in a layout that isn't circular. That could be fun.

Please drop by the blogs of the other Double Duty members and comment on their work:

Barb

Jeanette

Carol