Here it is - the last day of our virtual Mini Stamp Camp. It sure has been fun trying new techniques, creative ways to feature paper and embossing folders, inks, etc!
If you haven't checked out each daily tutorial by our Camp Counselors, here's the list and links to their blogs:
Here's my card for today's tutorial featuring Cosmic Shimmer Metallic Gilding Polish from Creative Expressions (so fun!)
I used 2 colors of Gilding Polish: Enchanted Gold and Ocean Teal.
This is a 5"x7" card when flat. It stands on it's own using the folds and the right side tucked under something that is popped up on the right side of the inside panel (the bow here)
Here's a view of the card from the top:
I haven't put any sentiment on the inside yet. Once I know who will receive it, I can finish the inside appropriately.
Ready to get started?? I hope so! Just take your time and have fun.
Cut 2 pieces of card stock to 5"x7". I used White 110# for the back panel and "Taken With Teal" by Stampin Up for the front panel. The stenciled panels for the front came from another piece of white 110# white card stock.
Next I polished the entire 2 white pieces of card stock with the Enchanted Gold. They dry pretty quickly but you may want to give it a couple of minutes before the next step.
Ready to stencil?? YAY!
Here's where you have 2 options:
1. Trim one panel slightly larger than the stencil you want to use. Then trim the 3 strips for the front after stenciling.
- OR -
2. Trim your strips now. Sizes:
two strips 1.5" wide and 5.5" long and one strip 2.25" wide and 5.5" long.
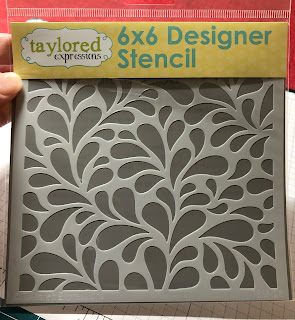
I did not trim my gilded 5x7" panel before using the 6X6 stencil. Duh! This meant that I had to reposition the stencil to completely cover the 7" card stock. Not a big deal if you can line up a repeating pattern. However, this pattern does not repeat. So there's my learning point!
All turned out well, because when I was trimming the strips I just cut it such that the scraps were the edges where the pattern didn't line up.
Here's my panel taped to my craft pad, stencil taped on top and the layer of Teal Gilding Polish applied.NOTE: I found it better to apply a thick layer of polish by daubing with the sponge applicator. Brushing it on did not work.
I was afraid to try Pixie Spray to the stencil to adhere it to the panel since it was gilded first. Let me know if you do it that way and how it worked for you.
When done with your stencil, drop it into some soapy water and let it hang out for a while. Then light brushing with your hand will remove the Gilding Polish.
Here's where I trimmed off the 3
strips and could discard these where the stencil didn't line up.
I didn't bother to clean the stencil when repositioning it. I just masked off the edge of the 5X7 panel, placed the stencil over the tape on that side, taped the stencil down again and continued daubing the polish.
Here's a photo of the stencil repositioned (uncleaned) and ready for me to finish stenciling the 5x7 panel. Notice the little spots of color along the left side. Those were trimmed off and discarded as shown in the photo above.
In hindsight, it's probably much easier to do option 2 above. Trim the 3 front panels (slightly longer than needed so you can tape them down) and stencil all 3 at once. That's what I'll do next time!
This part needs some drying time before you can finish trimming and adhering it to your front panel.
Time to create the fun fold! Take the front panel and using a ruler or a scoring board score as follows:
1/2"
2 1/4"
4 3/4"
6 1/2"
Ignore the purple card stock in the photo. This is my template that I use so that I can make this fold without having to look up how to do it!
Now to fold:
Burnish the left and right 1/4" scores so that they stick up.
Next, burnish the 2 remaining scores so that you end up with this shape:


Oh what a stunning fold Darlene, and I love the fabulous stencilling with the gilding paste. Thanks for the tutorial Darlene
ReplyDeleteStay safe
Blessings
Maxine
These are beautiful. I cannot wait to go and try these out--so pretty. And, a great tutorial!
ReplyDeleteOh Darlene here card is an absolute vision! I love the vibrant turquoise paired with the friend die cut and this is one fabulous fold! I am super excited to give this a try and just keep putting my pots of gilding paste lol thank you so much for your fabulous tutorial! Camp hugs!
ReplyDeleteWow- this is fabulous! I love the gilding polish thru the stencil. Also, love the fold you created with. Wonderful!!!
ReplyDeleteWhat a beautiful fun fold card and amazing art on each panel! Awesome work!
ReplyDeleteI am loving this fold and have used it twice so far. Does it have a name?
ReplyDelete